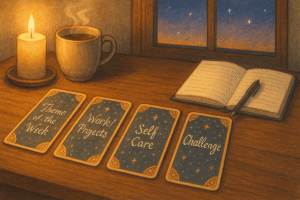
Table of Contents
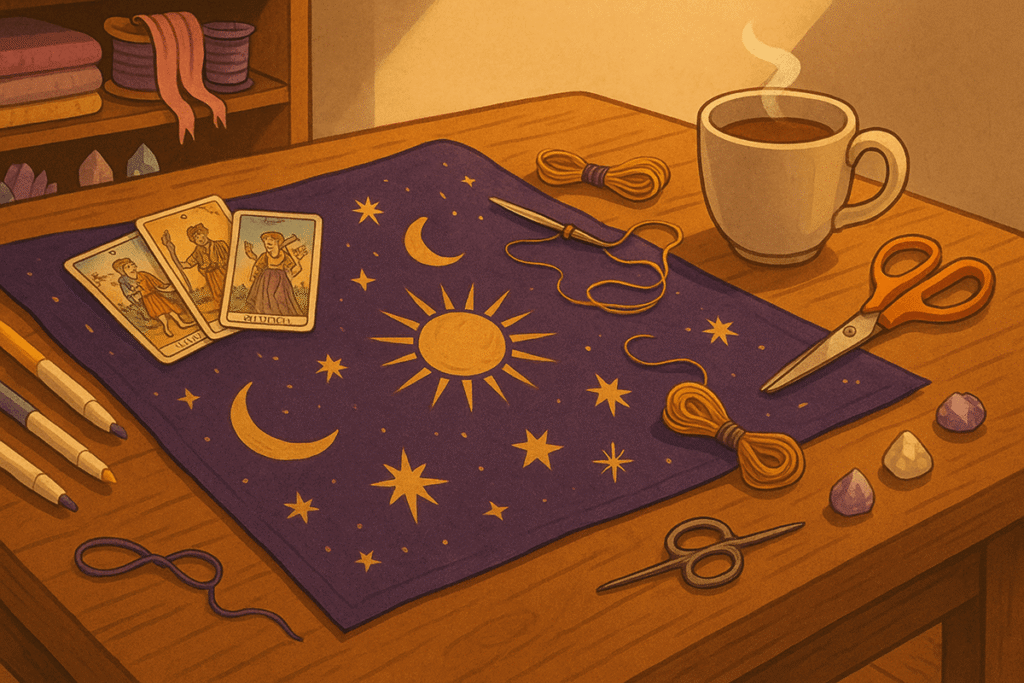
There’s something special about having a dedicated space for your tarot practice. I think it changes the whole feeling of a reading when you have that intentional surface to work with. A tarot cloth doesn’t just protect your cards from scratches or dirt. It creates a boundary, a sacred little zone where you can focus without distraction. And when you make one yourself? That adds a whole other layer of meaning to your practice.
The good news is that creating your own tarot cloth is surprisingly simple. You don’t need to be a master seamstress or spend a fortune on supplies. Perhaps the most exciting part is that this is entirely yours to design. Whether you prefer something minimalist and clean or rich with symbols that mean something to you personally, the choice is completely in your hands.
Why Make Your Own Tarot Cloth
Before we dive into the actual process, it’s worth thinking about why a handmade cloth might enhance your reading practice. Commercial tarot cloths are fine, but they’re mass produced. They carry the energy of a factory line, not your intentions. When you create something with your own hands, you’re putting a piece of yourself into it from the very beginning.
I’ve noticed that when I use tools I’ve made myself, my readings feel more grounded. There’s a connection there that’s hard to explain. Maybe it’s just psychological, or maybe there’s something more to it. Either way, the act of creating can be meditative in itself. You’re already engaging with the reflective practice before you even draw your first card.
A personalized cloth also serves as a visual anchor for your practice. The colors you choose, the symbols you add, even the texture of the fabric can all contribute to the atmosphere you want to create. Do you want your readings to feel calm and introspective? Or energized and transformative? Your cloth can support whatever intention you bring to the table.
Gathering Your Materials
Let’s start with what you’ll need. The beauty of this project is its flexibility. You can go as simple or as elaborate as you like.
For the basic cloth itself, you’ll want a piece of fabric that’s large enough to lay out your spread comfortably. Most people find that somewhere between 18 to 24 inches square works well, though you might prefer something larger or smaller depending on your typical spread size. Natural fabrics like cotton, linen, or silk tend to feel better for this purpose. They have a weight and texture that synthetic materials sometimes lack.
If you’re going the no-sew route, you’ll also want fabric scissors and possibly some fabric glue or iron-on hem tape. For the simple-sew method, basic thread and a needle will do, though a sewing machine makes the process faster if you have access to one.
When it comes to decoration, fabric markers are your most straightforward option. They come in various colors and tip sizes, and they’re permanent once heat set. If you’re feeling more ambitious, embroidery floss and a hoop can create beautiful, textured designs. You might also consider fabric paint, stamps, or even iron-on transfers, though I find these can sometimes feel less personal.
The No-Sew Method
Let’s start with the easiest approach. If sewing isn’t your thing, or if you simply want something quick, this method will get you a functional and beautiful cloth in under an hour.
First, cut your fabric to your desired size. Add about half an inch on all sides if you plan to use hem tape, since you’ll be folding the edges under. If you’re not hemming at all and you’ve chosen a fabric that doesn’t fray easily, like felt or fleece, you can skip this step entirely.
Iron-on hem tape is remarkably simple to use. You fold the edge of your fabric over, tuck the tape inside that fold, and then iron it according to the package directions. The heat activates the adhesive, and your edge stays neatly finished. Work your way around all four sides. The corners can be a bit tricky. I usually fold them like you would wrap a present, making neat diagonal folds. It takes a little practice, but it looks clean when you get it right.
Some fabrics fray more than others. If you’ve chosen something like cotton that tends to unravel, the hem tape becomes more important. But honestly, even a slightly frayed edge can add character. It depends on the aesthetic you’re going for.
The Simple-Sew Method
If you’re comfortable with basic stitching, a simple hem gives your cloth a more polished look. You don’t need fancy stitches or perfect technique. Just something that holds the edges in place.
Fold each edge over about a quarter inch and press it with your iron. Then fold it over once more, another quarter inch, and press again. This creates a double-fold hem that hides the raw edge of the fabric completely. Pin it in place if that helps you keep everything aligned.
Now comes the actual sewing. If you’re hand stitching, a simple running stitch or whip stitch along the inner fold will secure everything. Keep your stitches relatively small and consistent, but perfect uniformity isn’t necessary. Hand stitching has its own charm, and minor variations actually make it look more intentionally handcrafted rather than machine made.
With a sewing machine, you can use a straight stitch about an eighth of an inch from the inner folded edge. Go slowly around the corners. You might need to stop with the needle down, lift the presser foot, pivot the fabric, and continue. It sounds complicated, but after the first corner you’ll get the rhythm.
Personalizing With Fabric Markers
Now for the fun part. This is where your cloth becomes uniquely yours.
Fabric markers offer immediate results with minimal skill required. Before you start drawing directly on your cloth, though, I’d suggest sketching out your design on paper first. You can even place the paper under your fabric and trace if your material is light enough to see through. This saves you from making permanent mistakes.
Think about what symbols resonate with your practice. Maybe you want to draw the phases of the moon along the border. Or perhaps simple geometric patterns that define different zones for past, present, and future placements. Some people like to mark specific positions for each card in their favorite spread. Others prefer to keep things more open and abstract.
Color choice matters more than you might think. Darker fabrics work better with metallic or light-colored markers, while pale fabrics give you the full range of options. I’ve found that starting with lighter colors and layering darker ones on top creates nice depth, but you can certainly work in any order that feels right.
After you’ve finished your design, heat setting is crucial. Place a cloth or piece of parchment paper over your artwork and iron it according to your marker’s instructions, usually for a few minutes on high heat. This bonds the ink to the fabric permanently and prevents it from washing out or smudging during use.
Adding Embroidery Details
Embroidery takes more time, but the results have a richness that markers can’t quite match. Even if you’ve never embroidered before, basic stitches are surprisingly easy to learn.
Transfer your design to the fabric first. You can use transfer paper, draw lightly with a washable fabric pen, or even print a design and pin it to your cloth to stitch through the paper itself. The paper tears away when you’re done.
A simple backstitch creates clean lines perfect for symbols or letters. Satin stitch fills in shapes solidly. French knots add texture and can represent stars or other small details. These three stitches alone can create complex and beautiful designs.
Perhaps start small. Maybe just embroider your initials in one corner, or a single meaningful symbol in the center. You can always add more later. There’s something satisfying about seeing your cloth evolve over time as your practice deepens.
Thread color is another opportunity for intention setting. Gold or silver threads catch the light and feel ceremonial. Earth tones create a grounded, natural feeling. You might choose colors based on chakras, elements, or simply what feels right aesthetically.
Design Ideas and Inspiration
If you’re stuck on what to actually put on your cloth, let me share some approaches I’ve seen work well.
The minimalist approach uses just a simple border or a single central symbol. This keeps the focus on the cards themselves without visual competition. Clean lines, maybe just a circle in the center to mark where you place your significator card.
The elemental approach divides the cloth into sections representing earth, air, fire, and water. You could use different colors for each quadrant or simple symbols like a triangle for fire, wavy lines for water. This works especially well if you often consider elemental associations in your readings.
Some people create cloths specifically designed for certain spreads. A Celtic Cross cloth might have ten marked positions. A three card spread could have three distinct zones labeled or decorated differently. This can be helpful when you’re learning, though it does limit your flexibility.
Celestial themes are popular for good reason. Stars, moons, constellations, and planetary symbols all connect to the cosmic elements present in tarot imagery. These designs tend to feel timeless and work with almost any deck style.
Or you might go completely abstract. Colors that make you feel calm or energized. Patterns that please your eye without representing anything specific. There’s no wrong answer here, really.
Caring for Your Tarot Cloth
Once you’ve created your cloth, you’ll want it to last. Most decorated cloths can be washed, though I’d recommend hand washing if possible. Use cool water and a gentle detergent. Avoid wringing or twisting the fabric, especially if you’ve done embroidery work.
Lay it flat to dry rather than hanging it, which prevents stretching. If it needs ironing after washing, iron from the back side to protect your designs.
Between uses, you might fold it and keep it with your cards, or hang it somewhere meaningful. Some people like to store their cloth in a special box or bag. However you keep it, treating it with care reinforces that this is a tool worthy of respect.
Making It Part of Your Practice
Creating the cloth is just the beginning. The real magic happens when you start using it regularly.
Each time you lay it out, you’re creating that intentional space I mentioned earlier. You’re marking off a boundary between the everyday world and the reflective space of your reading. This ritual element, even if it’s as simple as unfolding a piece of fabric, helps shift your mindset.
You might want to cleanse your cloth occasionally, just as you might cleanse your cards. Some people pass it through incense smoke or leave it under moonlight. Others simply wash it with intention. What matters is that you’re maintaining the energy of this tool you’ve created.
As your practice evolves, your cloth might too. Perhaps you’ll add new symbols as they become meaningful. Or create additional cloths for different purposes or seasons. There’s no requirement to stick with your first design forever.
The act of making something with your hands for your spiritual practice connects you more deeply to that practice. You’re not just a consumer of tarot tools. You’re an active participant in creating the environment and atmosphere of your readings. And honestly, that shift in perspective can be just as valuable as the cloth itself.
Frequently Asked Questions
What size should I make my tarot cloth?
The best approach is to lay out your most common spread with your actual deck and measure it, then add a couple of inches on all sides. Most people find 18 to 24 inches square works well for standard spreads, but if you regularly use larger layouts like the Celtic Cross, you might want to go bigger. Consider making the cloth large enough that your cards won’t hang off the edges when you’re working.
Can I use any type of fabric for a no-sew cloth?
Avoid stretchy or super thick fabrics, as both will create problems with folding and laying flat. Felt and fleece are great no-sew options since they don’t fray at all, meaning you can skip hemming entirely. Cotton works well and stays flat without bunching up when you’re shuffling cards. Just keep in mind that lighter cotton will fray if you don’t finish the edges somehow.
Do I need to test fabric markers before drawing on my cloth?
Yes, absolutely. Always test your chosen marking method on a spare swatch of the same fabric before applying it to the real thing. Different fabrics react differently to markers. What works beautifully on smooth cotton might bleed or look patchy on something with more texture. A quick test on a scrap piece saves you from ruining your whole project with a permanent mistake.
Will embroidery be too difficult if I’ve never done it before?
Not at all. Basic embroidery uses just a few simple stitches that anyone can learn in minutes. A backstitch creates clean lines, satin stitch fills shapes, and French knots add small details like stars. You can start with something small like your initials or a single symbol in one corner. The nice thing about embroidery is you can always add more later as you gain confidence.